Installing LED headlights is one of the most rewarding DIY upgrades you can make to your vehicle. The difference in visibility is dramatic — and the installation is simpler than most people expect.
Before You Begin
Before starting, confirm you have the correct LED bulbs for your vehicle. Check the bulb type (H4, H7, 9005, H11, etc.) and ensure your LED kit includes everything needed — bulbs, drivers, anti-flicker modules (if applicable), and mounting accessories. The SAE J573 standard defines bulb base dimensions for reference.
Required Tools
- Screwdriver (Phillips head, flat head)
- Trim removal tool (for vehicles requiring grille access)
- Gloves (avoid touching LED chips with bare fingers)
- Flashlight
- Zip ties (for securing wiring)
- Socket set (some vehicles use bolt-on dust covers)
Safety Precautions
Important: Never touch the LED chip surface with bare fingers. Oil from skin can cause hot spots that damage the LED. Always handle LED bulbs by the heatsink or housing. Also, allow halogen bulbs to cool fully before removal — they operate at 250-500°C and can cause severe burns.
Step 1: Access the Bulb Housing
Bulb access varies by vehicle. On most: simply reach behind the headlight housing. On others: remove the fender liner (turn wheels fully, remove plastic push-pins), remove the grille (pull clips/push-pins), or access through the wheel well. Check vehicle-specific guides online. TUHO LED bulbs are designed to fit standard bulb access openings.
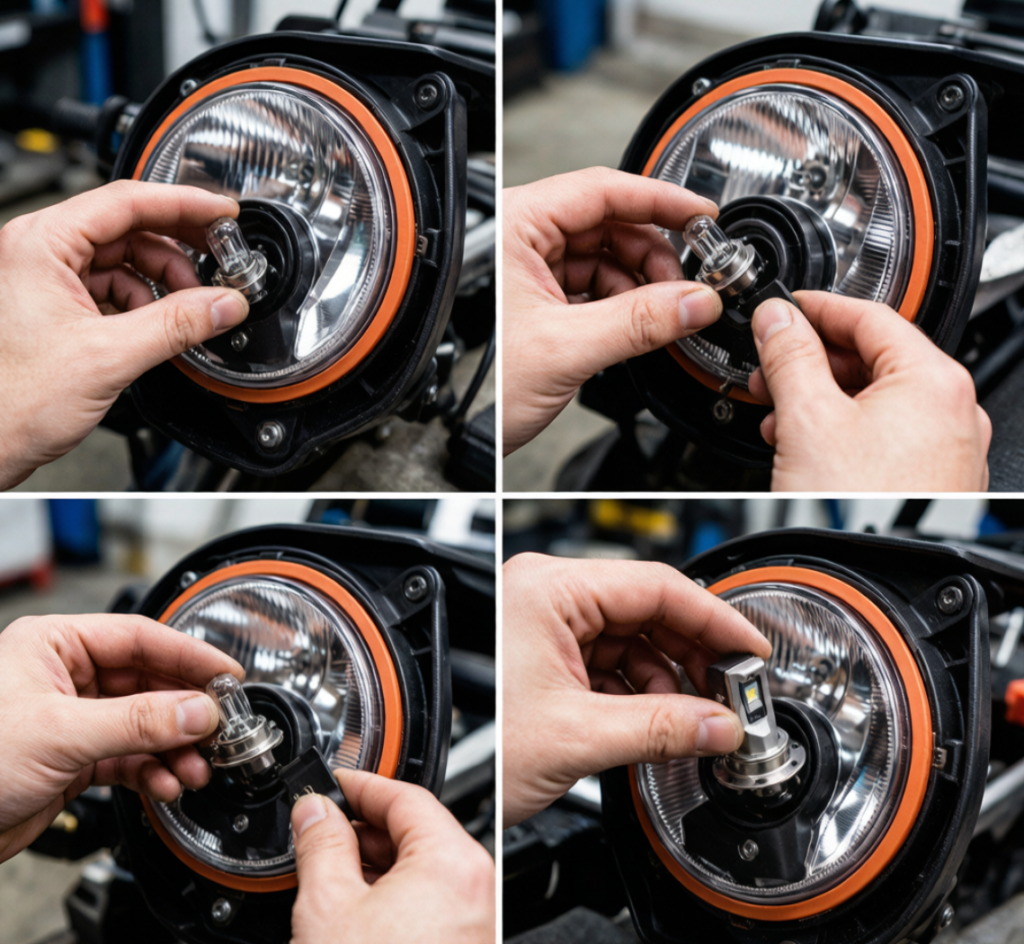
Step 2: Remove the Old Halogen Bulb
Unplug the wiring connector from the bulb. Release the retaining clip or spring that holds the bulb. Remove the old halogen bulb without touching the glass. Set aside for reference (keep as emergency spare).
Step 3: Prepare the LED Bulb
Remove the LED bulb from its packaging. Separate the bulb from the driver module (if they are separate). Identify the correct orientation — most LED bulbs have a specific “up” position for proper beam pattern. Check alignment marks or notches on the bulb base.
Step 4: Install the LED Bulb
Critical step — bulb orientation: LED bulbs must be installed with the LED chips aligned horizontally (3 and 9 o’clock) for proper beam pattern in reflector housings. Some bulbs use a rotating collar to adjust orientation. If the beam pattern looks wrong after installation, rotate the bulb 180° and retest.
Insert the LED bulb into the headlight housing. Secure with the factory retaining clip or spring. Reattach the wiring connector — it should click firmly into place.
Step 5: Connect the Driver & Wiring
If the LED bulb has a separate driver module, find a secure mounting location inside the headlight housing area. Use zip ties to secure the driver. Ensure wiring does not interfere with cooling fans. Connect the anti-flicker decoder (if required for CANbus vehicles).
Step 6: Secure the Dust Cover
Some LED bulbs have larger driver/heat sinks that prevent the factory dust cover from fitting. Solutions: use an extended dust cover (included with quality LED kits), check if the dust cover can be modified, or verify the bulb fits without the cover in some housings where the seal is not critical.
Step 7: Repeat for the Other Side
Repeat steps 1-6 for the other headlight. Then test both sides before reassembling any panels.
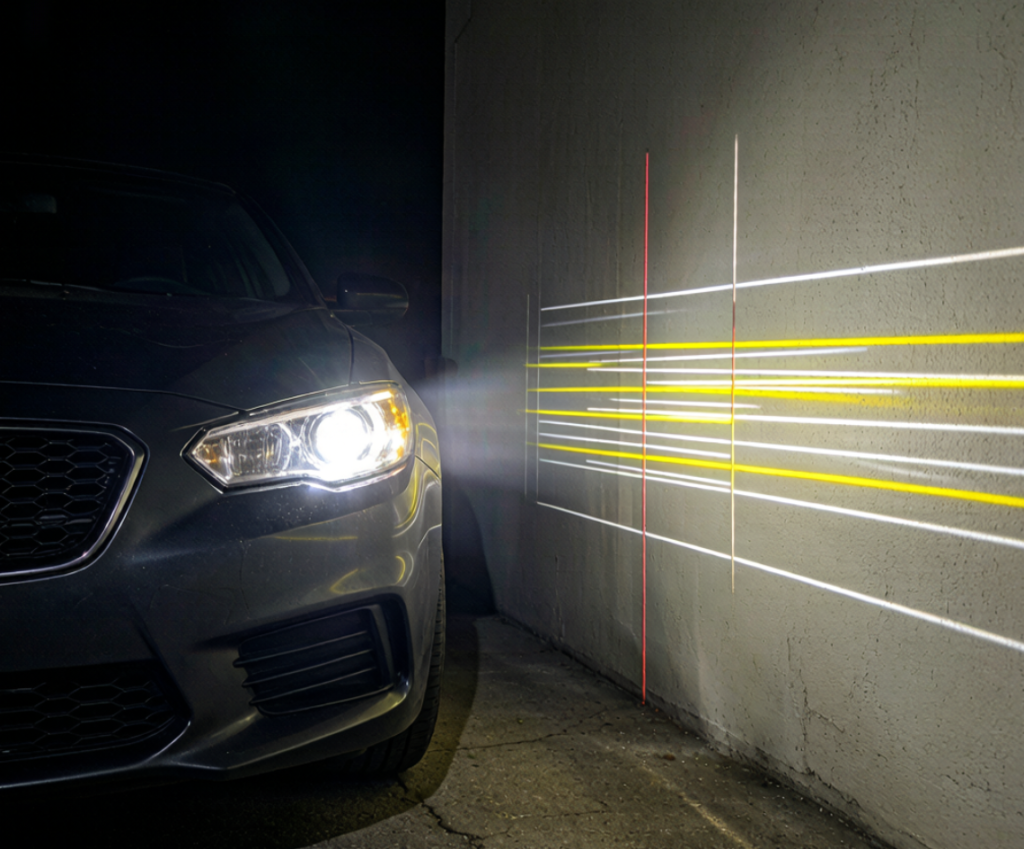
Step 8: Test & Aim
Test the headlights against a wall 25 feet away. The cut-off line (the horizontal line between light and dark) should be level and at the correct height. Adjust using the headlight adjusters — typically a 4mm or 6mm hex socket or Phillips screw near the headlight. The NHTSA FMVSS 108 specifies headlight aim requirements for US roads.
Troubleshooting Common Issues
| Problem | Likely Cause | Solution |
|---|---|---|
| Flickering | CANbus incompatibility | Add anti-flicker decoder or relay harness |
| Dashboard error light | CANbus resistance mismatch | Install CANbus adapter/resistor |
| Poor beam pattern | Bulb orientation wrong | Rotate LED bulb 180° or adjust orientation collar |
| One side not working | Loose connection, polarity | Check all connectors, reverse polarity if needed |
| Fans not spinning | Insufficient warm-up temp | Normal — fans only activate when needed |
Pro Tips for Best Results
- Install both low beam and high beam LEDs at the same time — matching color temperature between the two is important
- Consider upgrading fog lights to LED as well for a complete lighting package
- Keep your old halogen bulbs in the glove box as emergency backups
TUHO LED Headlight Kits
Ready to install your TUHO LED headlights? TUHO Lighting kits include everything needed for a successful installation: matched pair of LED bulbs with drivers, anti-flicker modules (CANbus compatible), extended dust covers where applicable, and detailed fitment guide. All bulbs are designed for direct plug-and-play installation.Browse TUHO LED Kits → | Need help choosing? Contact us
FAQ
How long does installation take?
15-45 minutes for most vehicles. Easy access: 10-15 min per side. Tight access: up to 45 min.
Special tools needed?
Basic tools only — screwdriver, maybe socket set. LED bulbs plug directly into factory sockets.
Can I install LED headlights myself?
Yes — beginner-friendly DIY. Accessing the bulb is the hardest part.
Do LEDs need aiming?
Yes — always check and adjust headlight aim after installation to prevent glare.
Why are my LEDs flickering?
Most likely CANbus incompatibility. Add an anti-flicker decoder or relay harness.
Conclusion
Installing LED headlights is a straightforward DIY project that delivers dramatic improvement in nighttime visibility. With basic tools and 30-45 minutes, you can transform your vehicle’s lighting performance. The key steps: access the bulb, remove the old halogen, install the LED with correct orientation, secure the wiring, and aim the headlights. With TUHO’s plug-and-play LED kits, the installation is simpler than ever.